





How to Use the MicroInfuser™
Owner's guide · MicroInfuser™
Everything from your first session to a lasting ritual
The official EvenSkyn® guide to the MicroInfuser™ at-home micro-infusion system: the kit, preparation, the seven-step session, the face map, 72 hours of aftercare, wait times, device pairing, troubleshooting, and who should not use it.
01 · At a glance
The six numbers that run every session
If you remember only this row, you will use the MicroInfuser™ the way it was designed to be used.
- 0.5 mmNeedle depth, fixed and mechanically locked at the head. Pressing harder cannot drive it deeper.
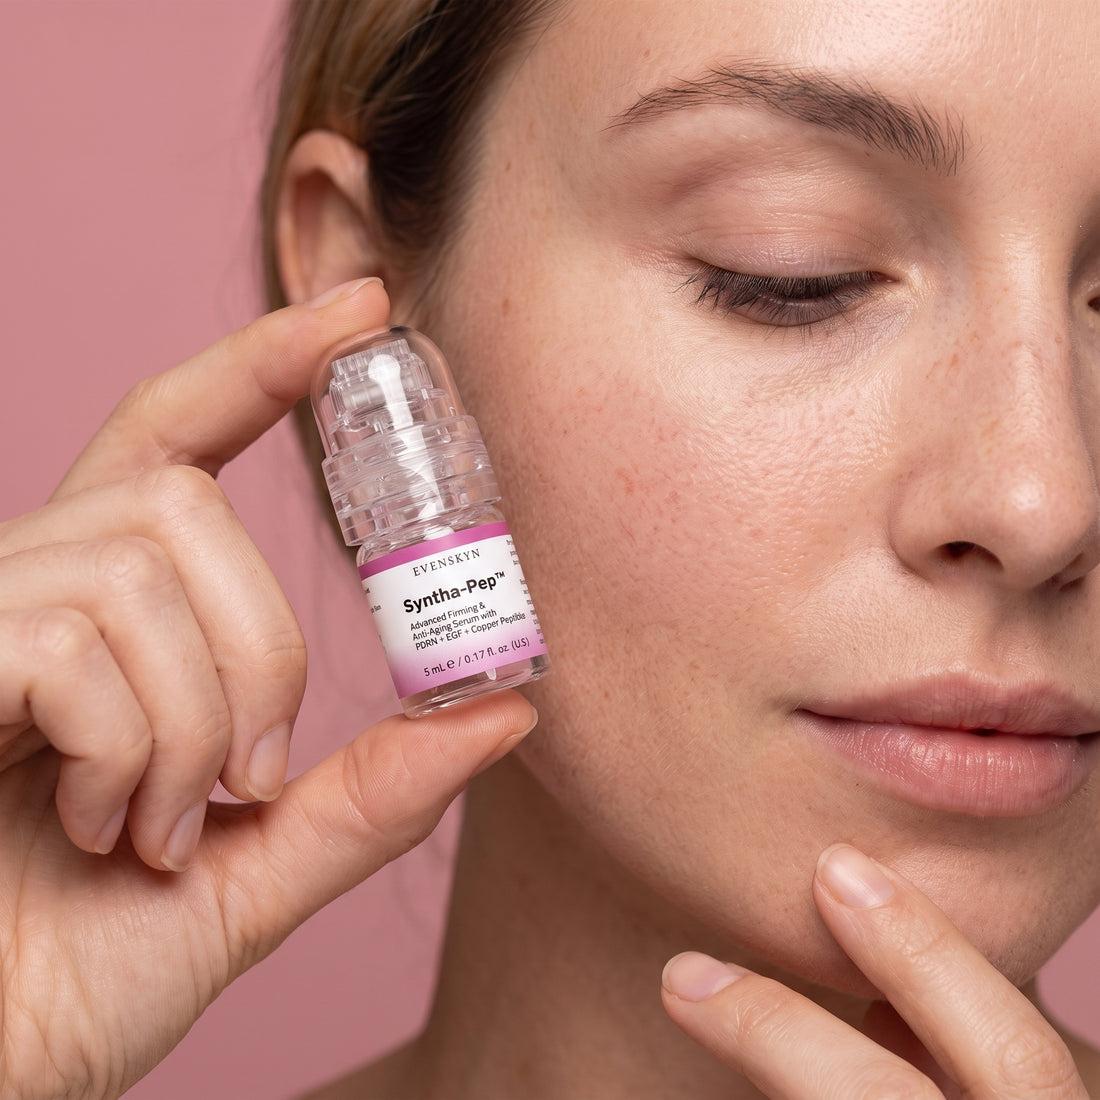
- 1 + 1One sterile needle head and one sealed 5 mL Syntha-Pep™ ampoule per session. Never reused.
- 14 daysStandard interval between sessions, in the evening so skin recovers overnight.
- 50%Overlap between each stamp, so no strip of skin is left untreated.
- 5 to 10 minA full session, from opening the ampoule to the final pat-down.
- SPF 30+Every morning while you are an active user, with particular care for 72 hours after each session.
02 · The kit
What is in the box, and what each session uses
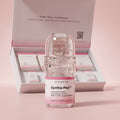
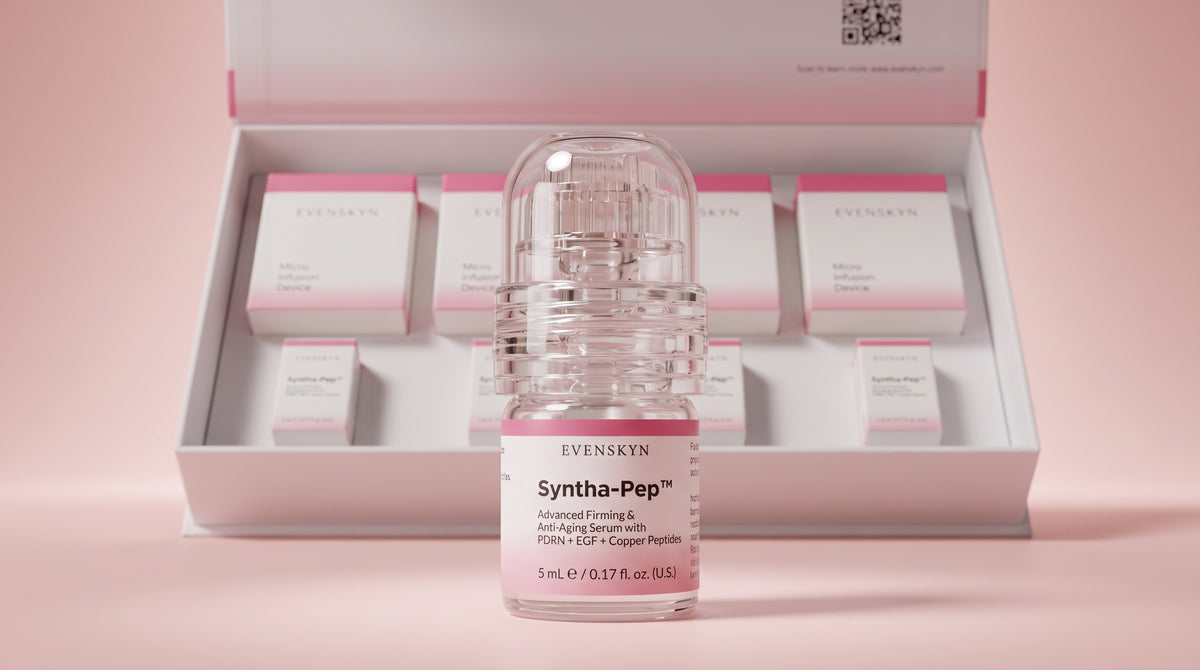
The MicroInfuser™ is a complete kit rather than a device you refill. Each treatment is one sealed ampoule clicked onto one sterile head, and both are discarded together at the end.
In the kit
- The MicroInfuser™ applicator, covered by a 12-month limited warranty
- Four sterile single-use needle heads with 24-karat gold-plated microneedles, individually sealed and gamma-sterilised
- Four sealed 5 mL ampoules of Syntha-Pep™ serum, cleanroom-filled under Good Manufacturing Practice
- The printed user manual with the face map and pairing protocols
Four treatments at the two-week cadence is about a two-month supply. The full ingredient declaration, batch certificates and supplier source documents are published in the Syntha-Pep™ Transparency Lab.
Have ready before you start
- A mirror at eye level and good light
- A residue-free cleanser, a clean towel and surface disinfectant
- Single-use gloves, optional but welcome if they make you more comfortable
- A rigid, puncture-resistant container with a lid for the used head
- A fragrance-free moisturiser or hydrating sheet mask for afterwards
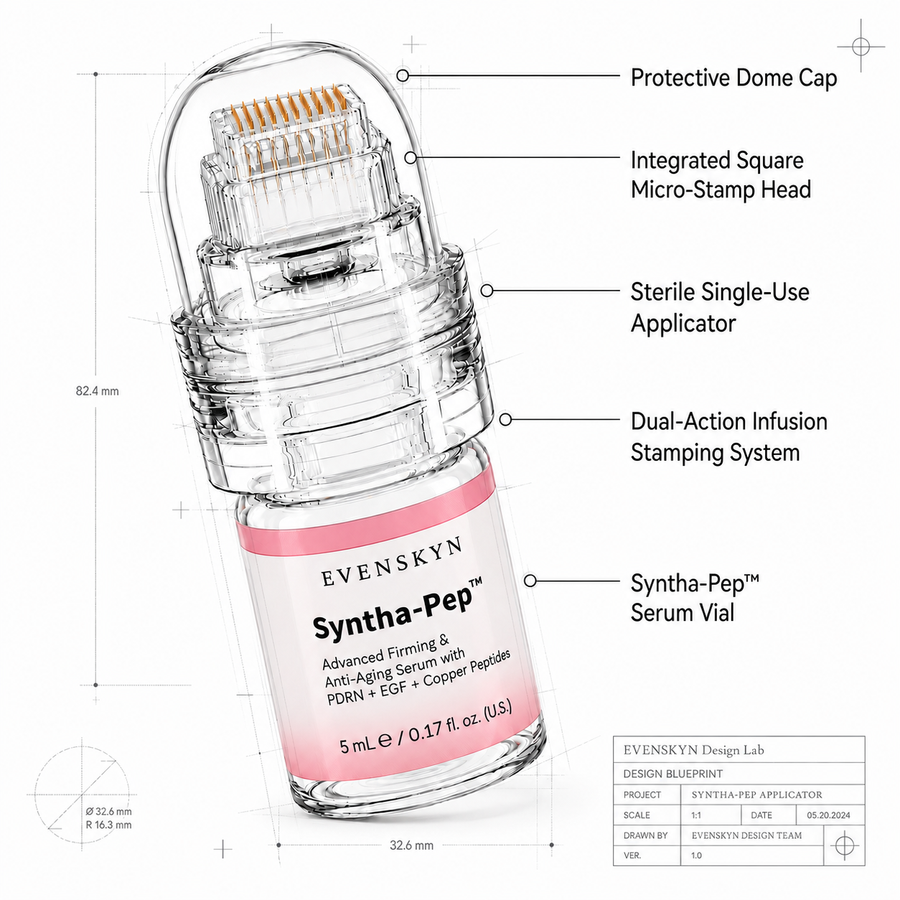
The applicator, labelled
Top to bottom: the protective dome cap, the square micro-stamp head with its 24-karat gold-plated needles, the click-on connector, and the 5 mL Syntha-Pep™ vial. About 82 mm tall. Head and vial are the single-use pair; the dome cap comes off last, just before you stamp.
03 · Before your first session
Two days of preparation, then a clean start
How your skin responds on the night depends on the 48 hours before it. None of this is difficult, and all of it shows in the result.

Once, before session one
Patch test
Stamp a small, less visible area (behind the ear or along the jaw) and wait 24 hours before your first full-face session. With rosacea, controlled eczema or psoriasis, melasma, or a history of post-inflammatory hyperpigmentation, extend that to 48 hours and stop at any unusual reaction.
48 hours before
Skin prep
- Pause retinoids, AHAs, BHAs and physical exfoliants (exact wait times are in section 08)
- Drink more water; go easier on caffeine and alcohol
- Stay out of direct sun and skip tanning beds entirely
- Prioritise sleep; rested skin is more comfortable on the night
On the day
Set up clean
- Tie your hair back and away from your face
- Double cleanse to remove every trace of makeup, sunscreen and oil, then pat dry with a clean towel
- Sanitise the surface you will work on and keep disinfectant within reach
- Wash your hands thoroughly, then sanitise the outside of the ampoule and its connector. Do not touch the needle head
- For the whole session, touch only your skin or the device. Cross-contamination is the most common cause of post-treatment breakouts
04 · The session
Seven steps, about ten minutes
Evening is the right time: skin recovers overnight, away from sun, makeup and pollution, and you wake to the hydrated look most people notice first. Watch the four short clips, then follow the steps.
-
1
Remove the ampoule cap
Hold the ampoule firmly and lift the cap straight off. You should feel the factory tamper seal release as it lifts.
Check: if the seal is already broken or the cap is loose before you touch it, do not use that ampoule. Email support@evenskyn.com for a replacement.

-
2
Click on a fresh sterile head
Press the needle head onto the ampoule until you hear and feel a secure click. The system is now sealed, with nothing open to the air. Keep your fingers away from the needles throughout.

-
3
Rest it upside down for one to two minutes
Turn the assembled device so the needle head points down and let gravity carry the serum into the chamber. Use the wait for a final hand wash and to settle in front of the mirror.
Check: tap the device once or twice on the back of your clean hand. One or two small droplets at the needle tips means it is ready. If nothing appears, rest it for another minute.

-
4
Remove the needle cap
Lift the protective cap off the needles without touching the tips. Inspect the head: if any needle looks bent, broken or missing, discard that head and use a new one.

-
5
Stamp the seven zones, in order
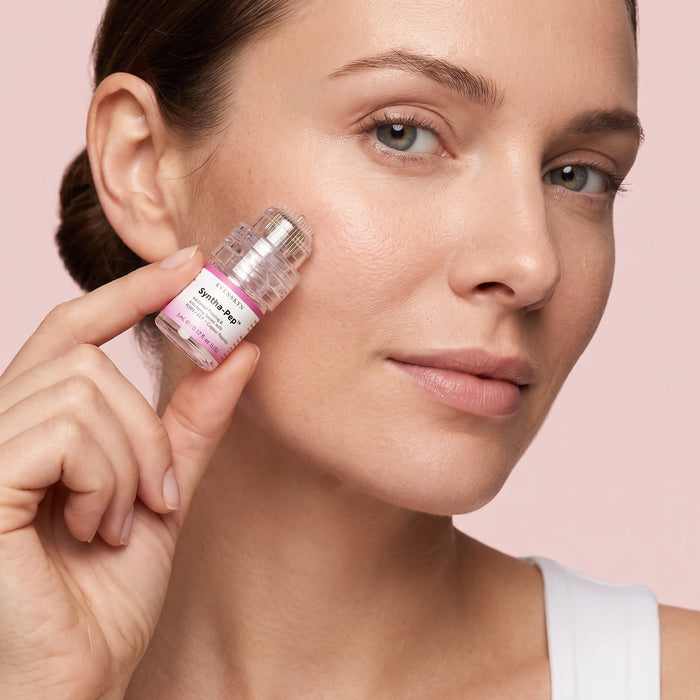
Hold the head flat to the skin and use light, controlled taps. Lift fully between each tap and place the next one so that about half of it lands on skin you have just treated and half on new skin. Micro-infusion is a tap-and-lift motion, never a slide, and pressing harder does not improve anything: the depth is locked, so extra pressure only adds irritation.
Work through the zones in the order on the face map, following the direction for each. For a stubborn area such as marionette lines, frown lines or crow's feet, add one or two extra sweeps after the standard pattern. Extra sweeps over depressed acne scars only when the skin is calm.

-
6
Pat the rest of the serum in
With clean fingertips, pat any serum left in the ampoule onto your face, neck and the backs of your hands. Skin takes up product readily in the first hour, so this step is worth doing properly.

-
7
Cap, discard, and let it be
Replace the protective cap, then discard the needle head and the empty ampoule together. The head is a sharp: seal it in a rigid, puncture-resistant container (see care and travel). Do not wash your face again tonight. Follow the aftercare below and sleep on a fresh pillowcase.

05 · The face map
Seven zones, 23 sweeps, one direction each
A sweep is one pass across a zone with the 50 percent overlap. Follow the numbers in order and the arrows for direction; a complete face takes only a few minutes.


- Never stamp: eyes, orbital area, lips
- Arrows: sweep direction, half overlap

| Zone | Direction | Sweeps |
|---|---|---|
| 1 · Forehead, full width | Vertical sweeps from the brow line up to the hairline | 5 |
| 2 · Right cheek | One curved sweep under the eye, over the cheekbone toward the temple, then two horizontal sweeps from beside the nose outward | 3 |
| 3 · Left cheek | Mirror of zone 2: one curved sweep, two horizontal | 3 |
| 4 · Nose bridge and upper lip | Downward sweeps from the bridge of the nose to just above the upper lip | 2 |
| 5 · Right lower face and jawline | Three horizontal sweeps from beside the mouth outward: above the lip along the philtrum area, along the lower-lip border, and along the jawline. Never on the soft lip tissue | 3 |
| 6 · Left lower face and jawline | Mirror of zone 5 | 3 |
| 7 · Chin | Vertical sweeps from the chin tip up toward the lower lip | 4 |
Never stamp: the eyelids, the under-eye hollow or anything inside the orbital bone; active breakouts, cystic acne or open lesions; sunburned, windburned or inflamed skin; raised scars, moles or skin tags; the lips themselves. The lip line is fine, the soft lip tissue is not. Around the eyes, pat leftover serum along the orbital bone with a clean fingertip instead.
On the curves of the face, exact geometric overlap is not possible. Aim for half new, half already treated, and let gentle, even coverage matter more than perfect alignment.
06 · What to expect
What is normal, and when the look of your skin changes
The sensation is mild and the visible progression is gradual. Knowing both in advance makes for a calm first session.
During the session
- A gentle tapping sensation where the head meets the skin
- Slight warmth or tingling, usually most noticeable on the cheeks and forehead
- No dragging, scratching or sharp pain. If you feel any of those, you are pressing too hard or sliding rather than lifting
In the hours after
- A light pink or red flush, typically for one to four hours
- Mild sensitivity, slight dryness or a glowing warmth
- A faintly tacky finish as the humectants settle; it resolves overnight
- Pinpoint bleeding is uncommon at a fixed 0.5 mm; a few tiny spots are not a cause for concern
The progress timeline on the standard two-week schedule
- Day 1 to 2Skin looks hydrated, refreshed and plumper, with a more even-looking tone.
- Week 1 to 2Texture looks smoother. Subtle changes in the look of tone begin.
- Week 3 to 4Fine lines begin to look softer and hydration looks deeper.
- Week 6 to 8The look of firmness starts to show. This is the milestone most people are waiting for.
- Week 12 and onThe look of firmness and smoothness keeps building through months three to six of consistent use.
- 8 to 12 sessionsFour to six months in, this is the window where areas like marionette lines and nasolabial folds show their most visible change.
These are typical responses reported across mature-skin users on the standard cadence. Individual results vary with starting skin condition, age, hormonal status, sun history and how carefully aftercare is followed. The MicroInfuser™ is a cosmetic device that supports the look of firmer, smoother, more hydrated and even-toned skin; it is not a medical device and does not treat any condition.
07 · Aftercare
The first 72 hours decide the result
The skin barrier is temporarily more open and more reactive after a session. The rule for this window: gentle, hydrating, protected.
Hours 0 to 24
The evening of, and the next morning
- Do not wash your face for the rest of the day. Let the serum absorb overnight
- No makeup. If you must the next day, use a mineral formula made for sensitive or post-procedure skin
- No sweating or strenuous exercise. Sweat carries bacteria into open micro-channels and is the most common cause of post-treatment breakouts
- No pools, saunas, steam rooms or hot tubs
- No hot showers. Lukewarm water only, and keep your face out of the stream
- Hands off. If you need to adjust your hair or glasses, wash your hands first
Hours 24 to 72
Recovery routine
- Cleanse gently with cool or lukewarm water and a pH-balanced, fragrance-free cleanser. Pat dry, never rub
- Moisturise twice a day with a fragrance-free peptide or hyaluronic acid formula. Reapply if skin feels tight
- Broad-spectrum SPF 30 or higher every morning, even indoors. UV on freshly treated skin is the leading cause of post-treatment hyperpigmentation
- Keep actives paused: no retinoids, AHAs, BHAs, vitamin C serums, scrubs or alcohol-based toners until their wait time has passed
- Red and near-infrared LED masks may resume from 24 hours on
- Skip heavy facial oils that can sit in freshly opened channels
What works well after a session
- A hydrating sheet mask within the first hour, 15 to 20 minutes, then pat in the essence
- Peptide or ceramide creams in the hours and days after
- Barrier-repair creams with Centella Asiatica, panthenol, beta-glucan, allantoin, ceramides or squalane, whenever skin wants extra calm
- Hyaluronic acid serums at any point from the first 24 hours on. They draw in moisture without irritation
Why topicals do not interfere: the serum is delivered through the micro-channels during the session, and that delivery is finished by the time you reach for a cream. Anything applied afterwards works at the surface, on a different layer.
Managing mild redness or pinpoint bleeding
- Rinse the area gently with cool water if you notice pinpoint bleeding
- Apply a fragrance-free barrier cream or a post-procedure recovery cream
- Hold a clean cold compress to the area for five to ten minutes if it feels warm or slightly swollen
- Sleep on a fresh pillowcase the night of the session
Stop and contact a healthcare provider if redness lasts more than 48 hours, swelling increases rather than settles, you see signs of infection (warmth, pus, fever), you feel unusual pain, or you develop hives or significant itching.
08 · Wait times
Ingredient and procedure wait times
Pause these before a session and resume them gradually afterwards. When in doubt, wait longer rather than shorter, and defer to the practitioner who performed any clinical procedure.
Everyday actives
| Ingredient | Stop before | Resume after | Why |
|---|---|---|---|
| Retinoids (retinol, tretinoin, retinaldehyde) | 48 hours | 72 hours | Thin the outer layer and raise sensitivity |
| AHAs (glycolic, lactic, mandelic) | 48 hours | 72 hours | Chemical exfoliation overlaps with channel formation |
| BHAs (salicylic acid) | 48 hours | 72 hours | Same as AHAs |
| Vitamin C (L-ascorbic acid) | 24 hours | 48 hours | Low pH can sting freshly treated skin |
| Scrubs and physical exfoliants | 24 hours | 48 hours | Friction is too aggressive on healing skin |
| Benzoyl peroxide | 24 hours | 48 hours | Drying and potentially irritating |
| Added synthetic fragrance, high-strength essential oils | Same day | 48 hours | Common post-treatment irritants |
| Red and near-infrared LED | Not required | 24 hours | Non-thermal and widely used after microneedling; the wait lets the initial phase settle |
Syntha-Pep™ has no added synthetic fragrance. It contains a trace of Citrus Aurantium Amara (Bitter Orange) Flower Oil, well below cosmetic fragrance-allergen thresholds, and it is fully compatible with the post-treatment window.
Clinical procedures and salon treatments
| Procedure | Before a session | After a session |
|---|---|---|
| Botox or neurotoxin injections | 2 weeks | 2 weeks minimum |
| Dermal fillers | 2 weeks | 1 to 2 weeks |
| Light (superficial) chemical peel | 7 days, fully shed | 7 days minimum |
| Medium-to-deep chemical peel | 4 weeks minimum | 4 weeks minimum |
| Ablative laser resurfacing | 4 to 6 weeks | 4 to 6 weeks |
| IPL or photofacial | 1 week | 1 week |
| Microdermabrasion | 3 days | 5 days |
| Hydrafacial | 2 days | 3 days |
| Hair colouring or chemical hair treatments | Same day is fine | 5 to 7 days |
Healing speed, skin sensitivity and the specific products used in your procedure can shift these. For a personalised read across everything in your routine, use the micro-infusion timing checker.
09 · Pairing devices
Using RF, ultrasound, EMS and LED alongside it
The sequence is directional. Energy devices before micro-infusion prime the skin; energy devices after it, on a freshly opened barrier, only add redness. Get the order right and the two routines compound.
The protocol
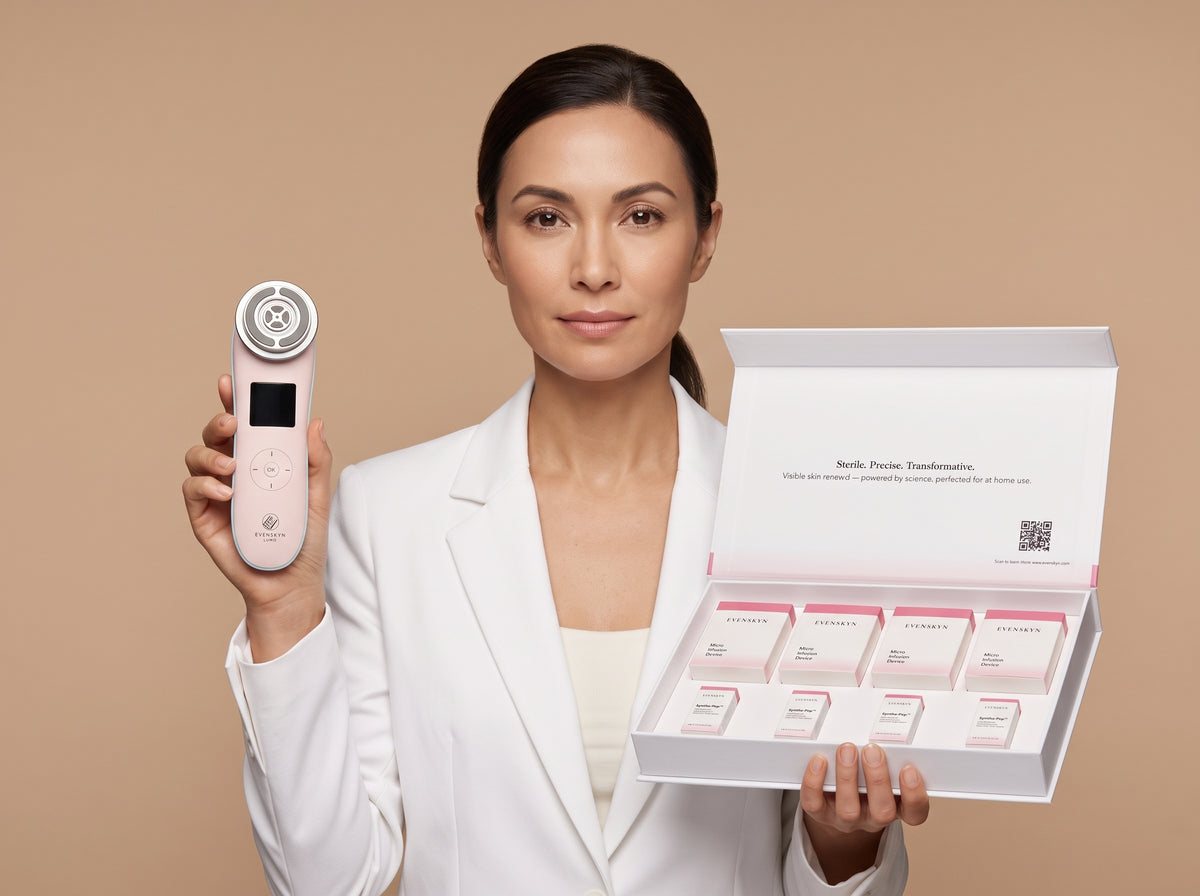
- Before, ideally the same day: run your RF, ultrasound, EMS or microcurrent device first, then the MicroInfuser™. Warmth and circulation prime the skin for the session
- After: the manual sets 24 hours as the minimum before any RF, ultrasound or EMS use. We would leave 48 hours, and three days if your skin runs sensitive. Heat, vibration or current on freshly treated skin amplifies redness and slows recovery
- Between sessions: keep your energy device on its normal schedule. Consistency there is what delivers the cumulative look
- LED: red and near-infrared masks can resume 24 hours after a session
Before you layer devices
- If you have a pacemaker, an implanted electronic device or any cardiac condition, speak with your physician before using EMS, microcurrent, RF or ultrasound. Those cautions exist independently of micro-infusion
- Introduce one device at a time over several weeks so you can see how your skin responds to each
- Hydration matters more when you are layering: water, and a gentle moisturiser applied faithfully
- Give a combined routine three months before judging it
For the full radiofrequency pairing schedule with the Lumo⁺, read RF and micro-infusion at home.
A two-week cycle, day by day
- Day 1Micro-infusion day. Evening: energy device as the warm-up, then the full MicroInfuser™ session, then a hydrating mask or peptide cream and bed.
- Day 2Rest. Gentle cleanser, moisturiser and SPF only. No devices.
- Days 3 to 4Gentle skincare. From day four you can begin reintroducing actives on the wait-time schedule above.
- Days 5 to 14Energy device back on its normal schedule, typically three to five times a week. Usual skincare returns.
- Day 15The next micro-infusion day. The cycle begins again.
10 · Troubleshooting
If something is not going to plan
| What you notice | Likely cause | What to do |
|---|---|---|
| Serum is not flowing through the needles | Not rested upside down for long enough, or air trapped in the chamber | Hold the device upside down for another one to two minutes and shake gently downward. Tapping on the back of your hand helps draw serum through. |
| No click when connecting the head | Misalignment, or debris on the connector | Remove the head, check the connector for debris, realign the head straight over it (not at an angle) and press firmly straight down. If there is no click on a second firm attempt, do not force it. Email support@evenskyn.com for a replacement head. |
| Loose fit or serum leaking at the join | Head not seated correctly | Push the ampoule and head together firmly until you hear and feel the click. |
| The device feels like it is dragging | Too much horizontal motion | Lift fully between sweeps. Tap and lift, never slide. |
| Redness lasting more than 24 hours | Over-stamping, pressing too hard, or sensitive skin | Use lighter pressure and fewer sweeps next time, and add an extra week before your next session. |
| Breakouts or irritation a few days later | Actives were not paused, or hygiene slipped | Recheck the wait times, sanitise hands and surfaces more thoroughly next session, and let skin recover fully before the next one. Consider a three-week gap until it settles. |
| Skin feels tight afterwards | Mild dehydration, common in the first 24 hours | A fragrance-free hydrating cream and more water. It should resolve within a day. |
11 · Care, storage, travel, disposal
Looking after the kit between sessions
Cleaning and storage
- Detach and discard the needle head immediately after every session
- Wipe any serum residue off the connector with mild soap and water, and let it air dry fully before it goes back in the box
- Store in the original box at 5 to 30 °C (41 to 86 °F), away from sunlight and heat, and never in the bathroom: humidity compromises sterility
- Keep every component out of children's reach
- Brief warmth in shipping is fine if the seal is intact and the serum is clear. Avoid sustained heat above 30 °C
Travelling with it
- Microneedle heads are not on the TSA prohibited items list and are generally permitted in carry-on and checked baggage in the United States. Keep them sealed in their packaging and check tsa.gov before flying
- Each ampoule is 5 mL, within carry-on liquid limits. Place them in your clear liquids bag
- Rules outside the United States vary. Check both countries' aviation security and customs rules before you fly
Disposal
- Used heads are sharps. Seal them in a rigid, puncture-resistant container (an empty screw-cap plastic bottle works) before discarding
- Many regions require sharps to go to a sharps bin, pharmacy take-back or household hazardous waste. In the United States, safeneedledisposal.org lists local options; in Canada, your provincial health authority; elsewhere, your municipal waste authority
- Never place loose needle heads in household recycling or regular trash
- Empty ampoules and outer packaging are recyclable where #5 plastic is accepted
12 · Suitability
Who should not use the MicroInfuser™
The fixed 0.5 mm depth removes the technique risks of adjustable devices, not the biological ones. Three tiers: do not use, ask your doctor first, use with a modified routine.
Do not use
- Oral isotretinoin now or within the past six months
- A personal or family history of keloid or hypertrophic scarring
- An active bacterial, viral or fungal infection in the treatment area, including cold sores
- Open wounds, abrasions or unhealed cuts where you would stamp
- Active cystic or inflammatory acne in the area
- An active eczema, psoriasis or dermatitis flare
- A chemical peel, laser treatment or significant sunburn within the past seven days, or skin that is still red, peeling or tender
- A known allergy to gold, stainless steel or any ingredient in the serum
Ask your doctor first
- Pregnancy, planning a pregnancy, or breastfeeding
- Blood thinners or anticoagulants, including warfarin, clopidogrel, apixaban, rivaroxaban and daily aspirin
- Oral antibiotics, topical antibiotics on the area, immunosuppressants, systemic steroids or anything else that affects healing
- Uncontrolled diabetes, an active autoimmune flare, or an unhealed surgical or cosmetic procedure on the face
- A history of cold sores in the treatment area; antiviral prophylaxis may be advisable
- A pacemaker or cardiac condition, if you plan to pair with RF, ultrasound, EMS or microcurrent
Use with a modified routine
- Rosacea, controlled eczema or psoriasis, melasma, or a history of post-inflammatory hyperpigmentation: extend the patch test to 48 hours and stop at any unusual reaction
- Deeper skin tones (Fitzpatrick IV to VI): watch for early pigment change, wear SPF daily, and treat the neck and chest conservatively. Not sure of your type? Take the Fitzpatrick skin type test
- Sensitive skin: patch test, start at one session every three to four weeks, then move to two weeks if skin tolerates it
- Neck and chest: lighter pressure, one or two fewer sweeps per zone than the face, and a three-week interval
Adults only, 18 and over. The MicroInfuser™ is a cosmetic device, not a medical one, and nothing on this page is medical advice. If anything above applies to you, or you are unsure, speak with a qualified healthcare provider before your first session. The reasoning behind each tier, including the isotretinoin rule, is set out in full in who should not use an at-home micro-infusion device.
13 · Questions
Frequently asked questions
How often should I use the MicroInfuser?
Once every two weeks, in the evening, which is the schedule the progress timeline is built on. If your skin has tolerated four to six sessions with no irritation, you may shorten the interval to once every ten days, about three sessions a month. Never shorter: at 0.5 mm, more frequent stamping does not improve the look of your skin and can compromise the barrier. Return to two weeks at the first sign of prolonged redness, dryness or sensitivity.
Does it hurt, and will it bleed?
Most people feel a gentle tapping with slight warmth or tingling, and little or no bleeding. Pinpoint bleeding is uncommon at a fixed 0.5 mm; a few tiny spots on thinner or more vascular areas are not a cause for concern. Dragging, scratching or sharp pain means too much pressure or a sliding motion.
Can I use it on my neck, chest or hands?
Yes, with care. Neck and chest skin is thinner and more prone to post-inflammatory hyperpigmentation, so use lighter pressure, one or two fewer sweeps per zone, and a three-week interval there. Deeper skin tones or a history of hyperpigmentation call for extra caution or a dermatologist's advice first. The backs of the hands tolerate standard pressure.
When will I see a difference, and how long does it last?
A hydrated, refreshed look within 24 to 48 hours. The look of firmness typically begins to show after six to eight weeks of consistent two-week sessions, and keeps building over four to six months. Results are cumulative and are sustained by keeping the schedule; if you stop, the hydration and glow effects fade gradually over three to six months.
Can I reuse a needle head if I sterilise it myself?
No. Heads are single-use only. Home sterilisation cannot match the gamma sterilisation used in manufacturing, reuse sharply raises the risk of infection, and the needle tips are damaged after one session.
Is the serum being injected into my skin?
No. The needles do not inject the way a syringe does. They create temporary micro-channels, and the serum travels through them in the same motion, reaching the upper skin layers far more efficiently than it could from the surface alone.
Can I use my RF, ultrasound or EMS device on the same day?
Before, yes, and it is the ideal warm-up. After, no. Wait at least 24 hours before any RF, ultrasound or EMS session, and 48 hours if you can. Heat, vibration or electrical stimulation on freshly treated skin amplifies redness and disturbs early recovery. On non-treatment days, keep those devices on their normal schedule.
My skin broke out after a session. What now?
Check three things: that you avoided any active breakout while stamping, that actives were paused for the full wait time, and that hands, surface and ampoule were sanitised. Let skin recover completely before the next session, and consider a three-week gap until it settles.
Is Syntha-Pep vegan? Where does the collagen come from?
Syntha-Pep™ is cruelty-free. We do not describe it as vegan, because we hold no formula-level vegan attestation. Supplier documentation reviewed in August 2026 records the PDRN as fermentation-derived and not salmon-derived, and the two collagen entries as fermentation-derived rather than animal-derived. The full ingredient declaration and the source documents are published in the Syntha-Pep™ Transparency Lab. Because the serum is applied through open micro-channels, anyone with a known allergy should read that declaration and speak with their clinician before first use.
I take blood thinners. Can I still use it?
Speak with your prescribing physician before starting. Even at 0.5 mm, anticoagulants can raise the chance of bruising and prolonged pinpoint bleeding. Your doctor knows your situation and can advise whether and when to proceed.
14 · Where the MicroInfuser™ stops
What to use where
The MicroInfuser™ covers the seven face zones and, with a lighter hand, the neck. It never stamps inside the orbital bone, and it does not replace the energy devices it pairs with. One face, four tools.

- MicroInfuser™: the seven face zones; neck and chest with a lighter hand
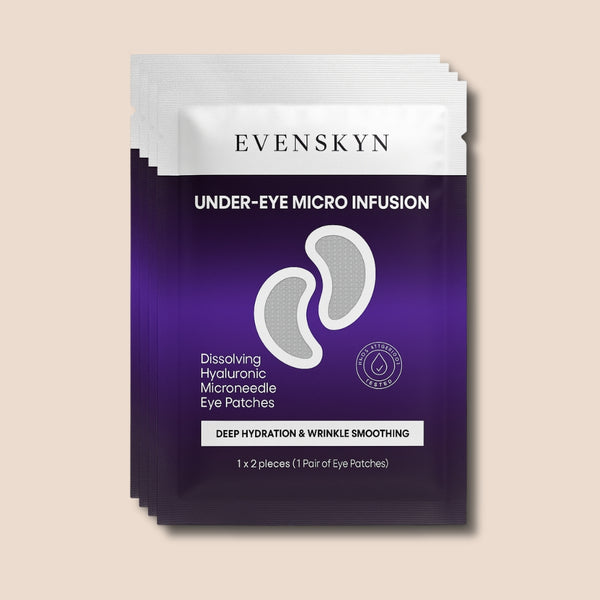
- Under-Eye Patches: the under-eye area the stamp never touches
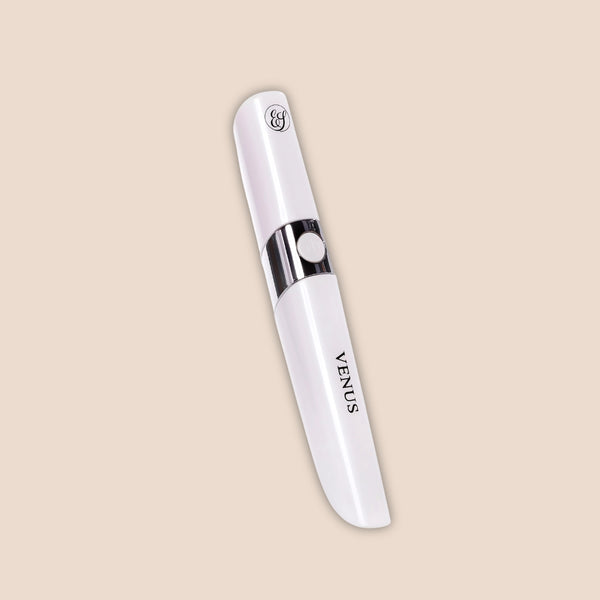
- Venus: the eye area, outside the orbital bone
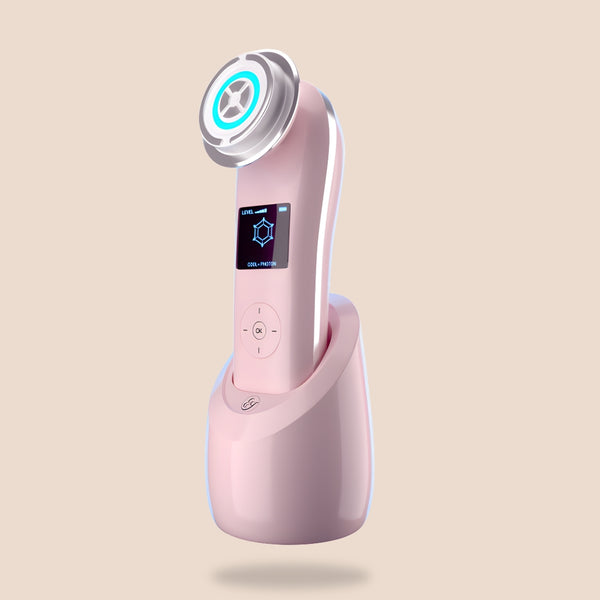
- Lumo⁺ RF: face and neck, same-day warm-up, then 48 hours off
Support
Questions about your kit, your routine or your order
Our care team is here Monday to Friday, 9 AM to 5 PM EST, at support@evenskyn.com or +1 (866) 999-1946. The applicator carries a 12-month limited warranty on manufacturing defects; heads or ampoules damaged on arrival can be replaced if you write within 14 days of delivery.
This page condenses the MicroInfuser™ User Manual (EvenSkyn®, 2026 edition). The current edition of every EvenSkyn manual is kept at evenskyn.com/pages/evenskyn-user-manuals. New to micro-infusion altogether? Start with what micro-infusion is and how it works, or compare kits in our guide to choosing a micro-infusion system.
The MicroInfuser™ is a cosmetic skincare device for personal at-home use by adults. It is not a medical device and is not intended to diagnose, treat, cure or prevent any disease or condition. It is intended only to support the appearance of healthy, youthful-looking skin. Individual results vary. Users are responsible for knowing local rules on at-home cosmetic microneedling devices.

